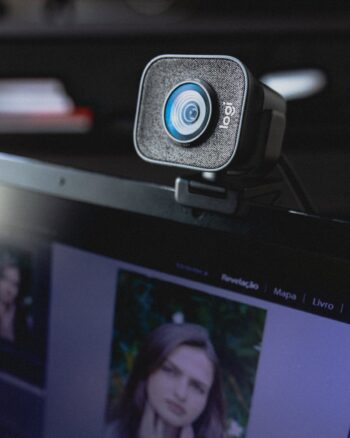
The purpose of this article is to help you quickly install and configure the motion package on a Raspberry Pi (3 or 4). This should also theoretically work for several Linux flavors such as Ubuntu, Mint, Elementary, etc. Per their website, “Motion is a highly configurable program that monitors video signals from many types of cameras.“

This package is great for those of you who want a quick and easy way to view USB driven cameras through the web and also store snapshots and time lapses of those images. This article will also briefly cover an example script you could use to not accidently fill up the Raspberry Pi with motion files which is exactly what I did and why I wrote this script.
For my specific purpose, I want to go to an IP and be able to view my camera’s feed and also store that information.
Update Raspberry Pi
I’m assuming you can either SSH into the Raspberry Pi or have direct access to it. As with any Linux installation, start out with the usual updating procedures.
sudo apt update && sudo apt upgrade Installing Git
We’ll need git later to clone the repository with the actual delete script
sudo apt install gitInstalling Motion
sudo apt install motionConfigure Motion
With motion installed, it’s time to configure it. For this tutorial, we’ll just have one webcam attached to the device. Let’s edit the configuration file
sudo nano /etc/motion/motion.confThese are the fields I’m updating. Setting daemon from ‘off’ to ‘on’
# Start in daemon (background) mode and release terminal (default: off)
daemon on
Rotating image if necessary (if webcam is sideways)
rotate 90Updating the resolution to my webcam’s specific pixel ratio
# Image width (pixels). Valid range: Camera dependent, default: 320
width 1920

# Image height (pixels). Valid range: Camera dependent, default: 240
height 1080
Double checking the target path for where the images and videos will be stored (this will be different if you’re mounting to a shared network drive, USB drive, or external USB HDD/SSD
# Target base directory for pictures and films
# Recommended to use absolute path. (Default: current working directory)
target_dir /var/lib/motion
Check that the stream port is set to port 8081 (web port will be 8080)
# The mini-http server listens to this port for requests (default: 0 = disabled)
stream_port 8081
There’s additional settings you can set for stream if you need it for tuning to your specific device
# Quality of the jpeg (in percent) images produced (default: 50)
stream_quality 100

# Output frames at 1 fps when no motion is detected and increase to the
# rate given by stream_maxrate when motion is detected (default: off)
stream_motion off

# Maximum framerate for stream streams (default: 1)
stream_maxrate 5

# Restrict stream connections to localhost only (default: on)
stream_localhost off

# Limits the number of images per connection (default: 0 = unlimited)
# Number can be defined by multiplying actual stream rate by desired number of seconds
# Actual stream rate is the smallest of the numbers framerate and stream_maxrate
stream_limit 0
I’m also keeping the authentication method set to 0 (disabled) for test purposes but you can actually set a password to view the stream:
# Set the authentication method (default: 0)
# 0 = disabled
# 1 = Basic authentication
# 2 = MD5 digest (the safer authentication)
stream_auth_method 0
Double checking the web port is 8080
# TCP/IP port for the http server to listen on (default: 0 = disabled)
webcontrol_port 8080
And that’s basically it for motion.
Starting Motion
Type the following command to have it start up:
sudo service motion startViewing the Web Stream
With motion installed, and the firewall enabled, let’s go ahead and go to the IP of the Raspberry Pi. One way to check is to run ifconfig and pull the IP that way
ifconfigNext, grab go to this url: http://{your IP}:8080 or http://raspberrypi.local:8080 if you haven’t changed the hostname
Installing the Delete Script
Clone the contents of this repo https://github.com/sigmaenigma/motion_utilities.git
git clone https://github.com/sigmaenigma/motion_utilities.gitThe important file we want is named motion_delete.py and the contents are below
import os

"""
This script checks a folder and deletes all files in that folder if they match a specific
file type. Additionally, an age check is implemented only delete desired files.
"""

# Type in FileTypes you wish to delete
snapshot_filetype = '*.mkv'
timelapse_filetype = '*.mpg'

# Number of days to check back (e.g. if 7, it will delete files greater than or equal to 7 days old)
snapshot_age = '7'
timelapse_age = '7'

default_motion_directory = '/var/lib/motion/'

def run_delete():
	try:
		print(f'Running...\n')
		os.system(f"find {default_motion_directory} -type f -mtime +{snapshot_age} -name {snapshot_filetype} -delete")
		os.system(f"find {default_motion_directory} -type f -mtime +{timelapse_age} -name {timelapse_filetype} -delete")
		print(f'Complete...\n')
	except Exception as e:
		print(f'Something bad happened: {e}')

run_delete()
What motion_delete.py is doing
The python file simply runs a delete command twice. You configure the filetypes and how old the files should be that you’re deleting. For example, to change the filetypes of your snapshot or timelapse files, edit the following code
# Type in FileTypes you wish to delete
snapshot_filetype = '*.mkv'
timelapse_filetype = '*.mpg'
To edit how old the files are that you want deleted, edit the following (this will delete files that are 7 or more days old)
# Number of days to check back (e.g. if 7, it will delete files greater than or equal to 7 days old)
snapshot_age = '7'
timelapse_age = '7'
Your default directory where motion stores files on a Raspberry Pi is /var/lib/motion/. Changed this in the motion_delete.py and motion configuration file (/etc/motion/motion.conf)
default_motion_directory = '/var/lib/motion/'The above can be a network drive, an external HDD/SSD or USB Drive.
Restart Motion
sudo service motion restartThat’s it! You should know be able to hit your URL, view the web stream and also check that the files were generated on the Raspberry Pi. If you’d like to configure a simple firewall, especially if you’re opening this up to the open world, I suggest you follow this short tutorial here:
Thanks for reading!
