The purpose of this article is to get you started with the initial setup of RetroPie on the Raspberry Pi Zero. What’s awesome about this project is that anybody can jump right in and do it since there’s literally no previous coding knowledge necessary. The setup was a lot easier on the Raspberry Pi 3 (and RetroPie does run faster on it) but I wanted to write a quick tutorial for the Zero since there were a few more steps in setting it up due to the limited USB ports. I’m assuming you already know this but these boards are hard to find although I was able to snag one from Adafruit’s website. Be sure to checkout RetroPie’s official website and GitHub site.
What’s RetroPie?
According to their website, https://retropie.org.uk/ “RetroPie allows you to turn your Raspberry Pi into a retro-gaming machine. It builds upon Raspbian, EmulationStation, RetroArch and many other projects to enable you to play your favourite Arcade, home-console, and classic PC games with the minimum set-up. For power users it also provides a large variety of configuration tools to customise the system as you want.
RetroPie sits on top of a full OS, you can install it on an existing Raspbian, or start with the RetroPie image and add additional software later. It’s up to you.
While the RetroPie Project originated at petRockBlock.com this is now the home of RetroPie.”
What you’ll need:
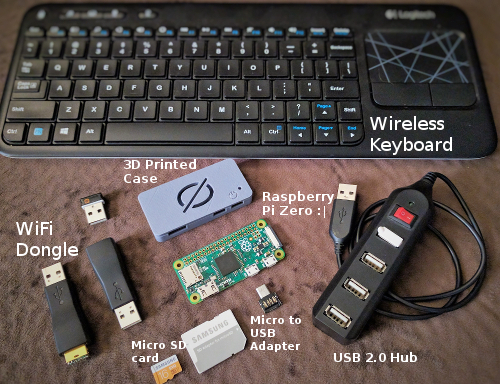
- Raspberry Pi Zero
- Micro SD Card (minimum 2.0GB)
- RetroPie Download for the Zero: RetroPie Link (Be sure to click on the link that says 0/1 once you get to the page)
- Case of some sort (I had mine 3D Printed)
- Micro HDMI to HDMI adapter (not pictured). *This is a small board and it will NOT accept a full sized HDMI plug
- Micro USB to regular USB adapter.
- USB 2.0 Hub of some sort (I tried an expensive 3.0 one thinking it’d be backwards compatible which didn’t work).
- WiFi Dongle (most will work) or at minimum a USB 2.0 to Ethernet for initial connectivity (SFTP file transfer of ROMs)
- A keyboard for initial setup if you wish to get into the configuration settings
- Another Linux or Windows PC you can SFTP into this one with for ROM transfer
- A power source for your Pi. (I’m using the Chromecast one at the moment since it’s already plugged into my display)
- Gamepad for complete immersion into the nostalgic gamebox you’re creating. You can go either with a USB SNES controller or I’d recommend getting an adapter for an original SNES controller since they will different and if you spent your entire childhood glued to one of these, you will feel the difference.
Purchase your Raspberry Pi Zero
Alright let’s get started. First things first, head on over to Adafruit’s website and snag yourself a Raspberry Pi zero. They’re most likely out but be persistent. They are out there.
Download RetroPie for the Raspberry Pi Zero
There is a difference in the download so make sure that when you go to the download site, you click on download for the “Raspberry Pi 0/1” http://bit.ly/2aFCya6.
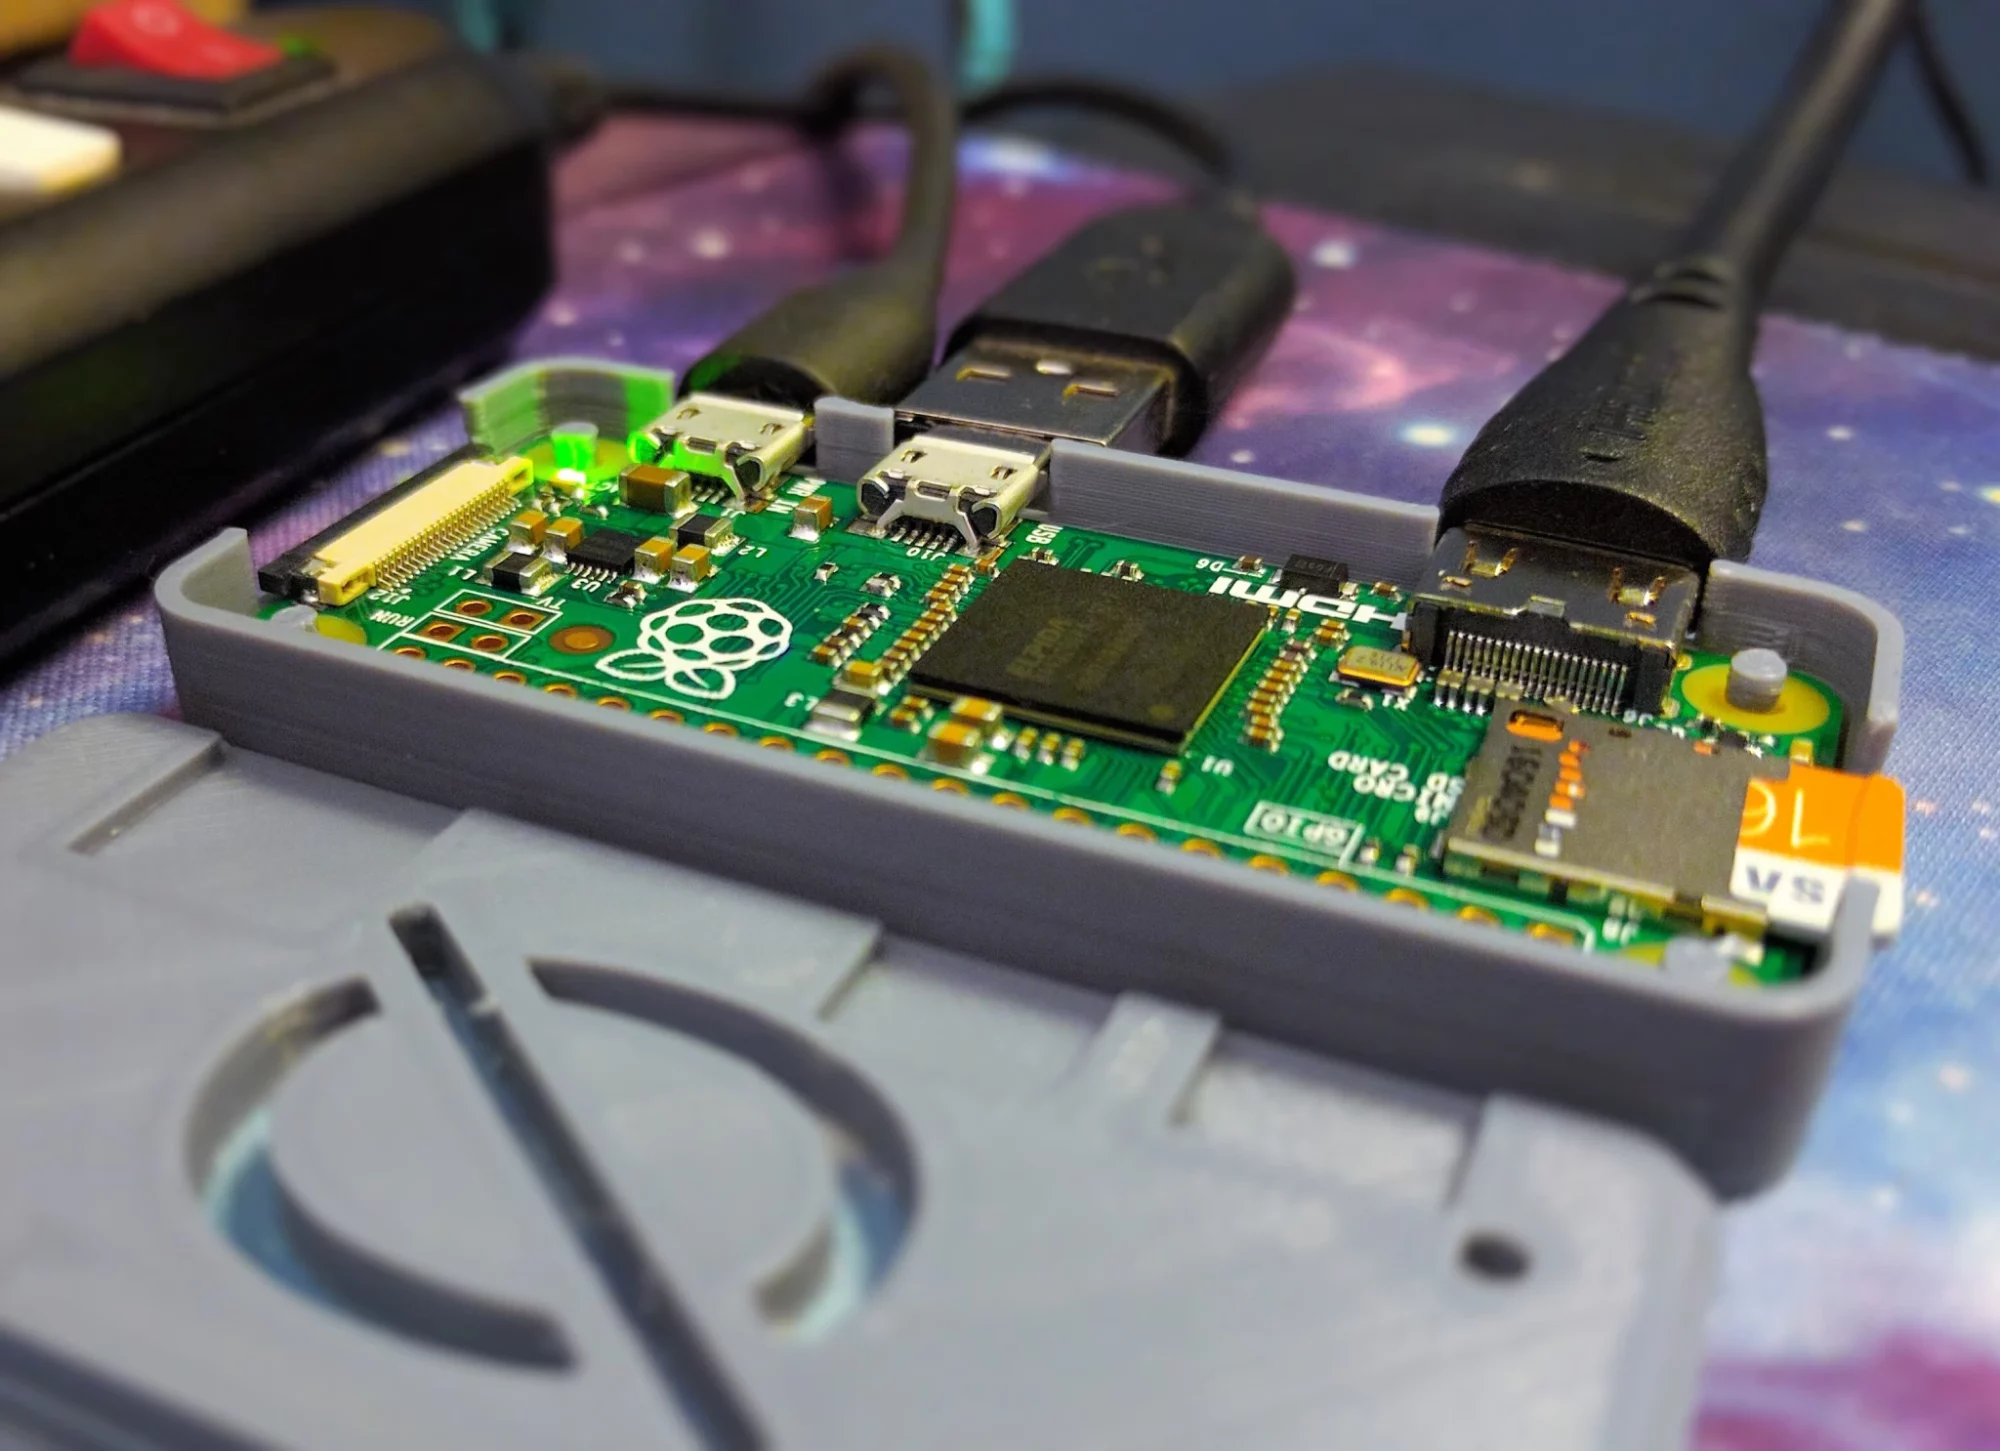
Hook up your peripherals
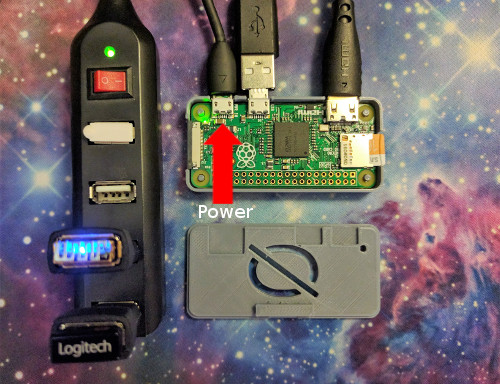
Connect your Micro USB adapter to the Pi, the USB hub to the adaptor, your WiFi dongle, your keyboard/gamepad, HDMI cable, and finally a MicroUSB power (Recommend 2.0A adapter). Note that the far left USB port is the power one.
Initial Setup
You’ll notice that as soon as you plug in the power cable, the Raspberry Pi Zero will turn on. Unfortunately, unless you setup something with the GPIO pins (the holes on the Pi that can accept input or output and be manipulated with something like Python) the only way to turn the Pi on and off is to unplug and plug that power cable.
If all went well, you should see a ton of text appearing and then the following image:
Followed by this image:
- As soon as the second image disappears you’ll be prompted to setup your keyboard/gamepad and start mapping keys to play your ROMs.
- In the RetroPie screen, you’ll also want to click on ‘Audio’ to set HDMI as your source of audio.
Once completed, you’re going to want to start loading this baby up with your games. I won’t ask where you got them and please don’t ask where I got mine. RetroPie should work with most of your games due to it’s ample amount of emulators it has for each console.
SFTP games into Pi
I transferred my games onto the Zero using SFTP so I’ll show you how I did that. There are other ways to get your games on this thing though.
For SFTP I recommend you do the following:
- First download Filezilla on your PC (assuming you’re using Linux, Mac, Windows, or a potato that is connected to the interwebz)
- Then install it and all that jazz
- On the Zero, go to RetroPie > Show IP > Note the IP address
- Reference below for what Filezilla should look like once it’s installed (blurred my directories out for obvious reasons)
- Hostname will be the IP
- Username and Password will be “pi” and “raspberry” respectively.
- Port 22 for SFTP
- Click ‘Quickconnect“
- Once you’re in, navigate to your ROMs on the left window
- On the Zero, navigate to /home/pi/RetroPie/roms/
- Then click on the console of your choice (e.g. snes, nes, n64, sega32x)
- Right click on your ROMs and click ‘upload‘
- Wait 😦
- Once the file transfer is completed, restart the Pi
- Upon boot, you’ll notice now that your console of choice is appearing in the slide show sequence

You’re all set!
Prepare for hours of nostalgia 🙂 Let me know below in the comments if you have any questions regarding this tutorial.
If you liked this link, and need some parts, feel free to click on the links below!