Hey everyone, today we’re going through the initial setup of an Arduino Nano that I had received as a gift from a friend. This is a simple tutorial where we’ll be loading up a script (built into the software) in Ubuntu in order to make an LED light fade in and out. I’m basically writing this because there was an annoying little user privileges hiccup I hit as well as realizing that the install script on the Arduino website (as of April 2017) seemed to contain an error and I wanted to have the updated code here as well for you.
Supplies
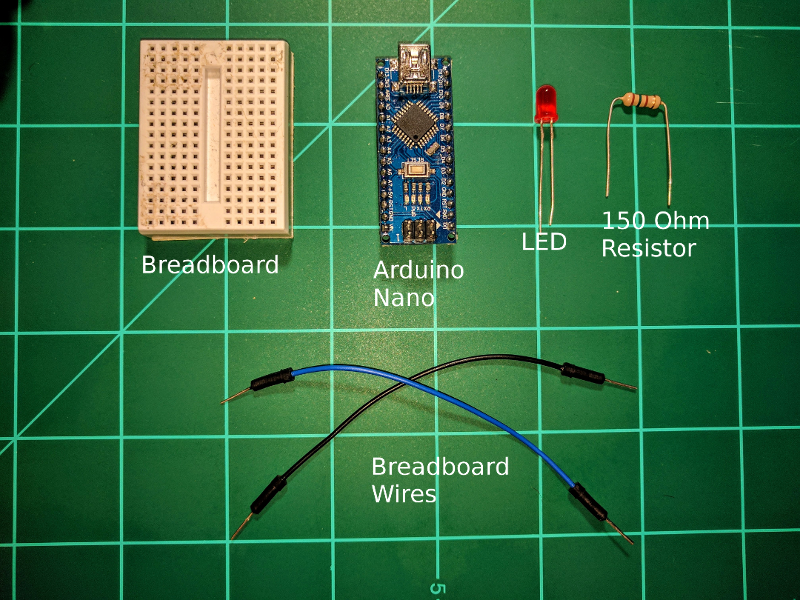
To get started, you’ll need the following items:
- A 64-Bit computer
- Ubuntu 22.04 LTS installed on the computer
- A breadboard
- An Arduino Nano board with an ATmega328 CPU
- Any LED (2-5V with an amp draw of under 40mA)
- A 150 Ohm Resistor
- Wires to connect in your breadboard
Installing the Arduino Software
- Navigate to the following link to download Arduino 64-Bit software: https://www.arduino.cc/en/Main/Software
- Extract the files and open up a terminal
- Navigate to the folder that the Arduino files saved to and look for a file called ‘install.sh’
- With your favorite editor we’ll need to change one of the lines in that file
- The solution is located here: https://github.com/arduino/Arduino/pull/6110/files but in short change the following line:
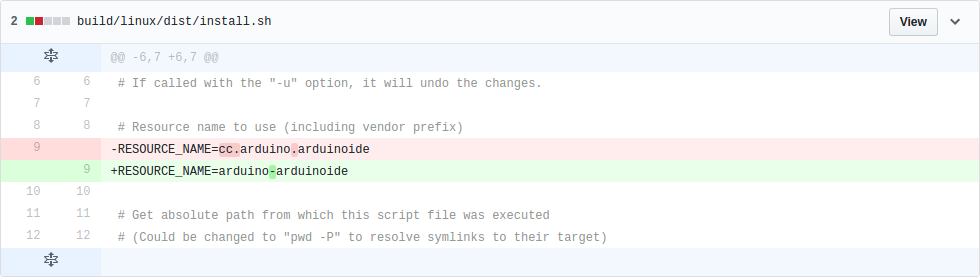
- Save once you’ve made the change
- ./install.sh
- Once completed, you’ll have a shortcut icon appear on the Desktop
Opening up the Arduino Software
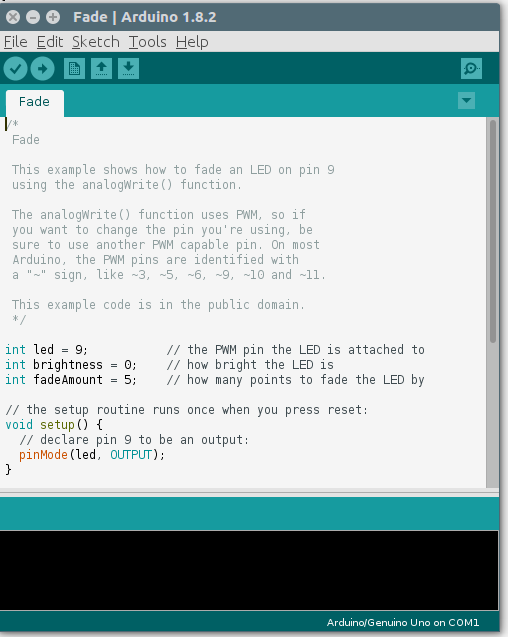
The software will actually tell you which pin to use, so I recommend doing the following:
- Go to your desktop and click on the Arduino IDE icon
- To open up the script we’ll be using (or Sketchbook) go to File > Examples > Basic > Fade
- The code will tell you to use the digital pin 9
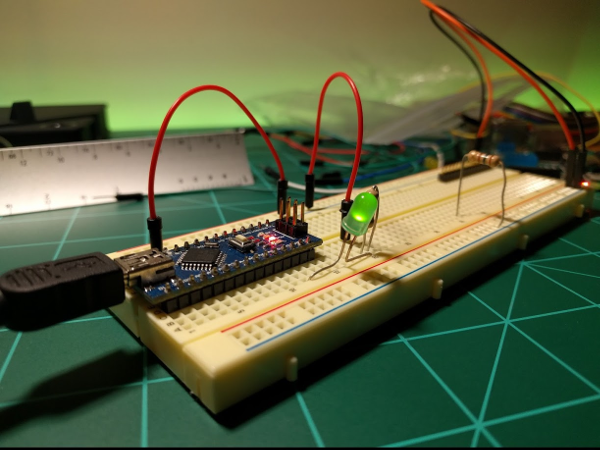
- Now it’s time to connect physical components
Putting the Arduino and its components in place
Collect the pieces I showed in the image above to get started.
- Place your Arduino Nano on the breadboard
- Place the 150 ohm resistor in between your ground pin and the short leg (Cathode or the negative side)
- The positive side of the LED will go to the digital pin 9 and this will turn the LED on
Change Ubuntu User Groups to successfuly write to the Arduino Nano
I encountered this little unforseen headache when trying to write to the Nano. Basically, we’ll need to add your user to the dialout user groups. This let’s the /dev/ttyUSB0 communicate correctly. To do this
- sudo usermod -a -G dialout <username>
- sudo chmod a+rw /dev/ttyUSB0
Uploading software to Arduino
We’re almost done. Now just compile your code by clicking ‘Upload’ or the right arrow in the IDE.
That’s it! Be sure to leave me any comments or questions should have any and I hope this tutorial helped you out.
-Adrian